Tuesday, May 31, 2011

2.for.Tuesday

I am a last minute kinda gal apparently [as if you didn't already know that ;)]. Do you think they would ever kick me off the team? I've really got to get a grip on this loading + blogging problem I have. I will give you the whole, real story...

one: This layout was finished on May 11th + loaded to the JS site on the same day. Yes, really. I did not blog about it. I did not load it to other sites. Here are the details: This girl is very social. She says hi to everyone. When she said hi to Daddy's boss he responded with a, "hi sweetheart." She promptly let him know that she is NOT sweetheart. She's Millie [name has been changed to protect the innocent]. She cracks me up on a regular basis. Products used [click here for links]: Splendid Fiins Very Crafty Ledgers Paper Pack [coming soon!] Splendid Fiins Feed Sack Paper Pack Splendid Fiins Little Letters Splendid Fiins Say What Stickers Splendid Fiins Mixed Bag Tape Strips Splendid Fiins Border Punches Set 2 Splendid Fiins Sew Crafty Messy Stitches Vol. 1


two: Chore Cards. I am determined to have help in keeping the house ordered this summer + beyond. My boys seem to have difficulties looking around a room and seeing what needs to be done. I’ve made up these Chore Cards using slightly modified See Below Journalers from Splendid Fiins and photos cut from magazines to give inspired looks at clean and organized rooms. I have a card for each room/area of the house for daily work + another for weekly deeper cleaning.
The idea is that the cards for all jobs available will be put out and they can choose which they want. "You Snooze You Lose" fully applies here as the jobs are first come first served [much like the MTC]. The cards will be laminated so they can cross off what they have finished as they do it + will be able to follow their own progress. Also, we do daily cleaning for each room/area of the house and then focus on one deep cleaning room/area per week. These two samples happen to be weekly cards. Each of us will be in charge one day a week + will oversee the job. This also includes getting it done. Even if that means doing it yourself. We have discussed the consequences of leaving someone to do their job alone [it very likely means that you will be doing your job alone tomorrow]. I hope it works.
I was hoping to have a photo of all of my finished cards but Costco cropped them when it didn't indicate cropping. I've ordered new ones. Hopefully the problem is resolved. I really don't want to resize them.
There you go. Not so bad I guess.

Tuesday, May 24, 2011

Saying Thank You

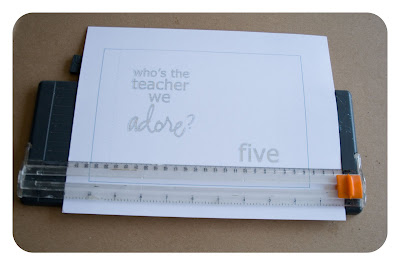
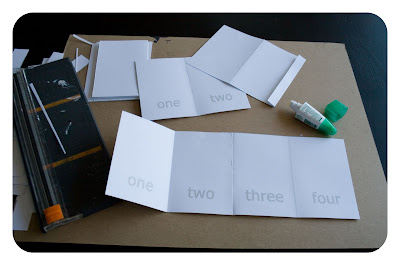
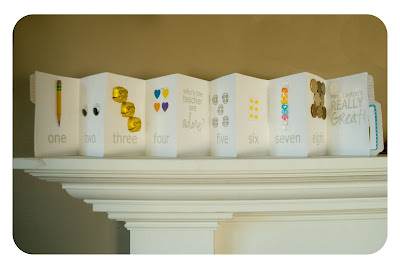
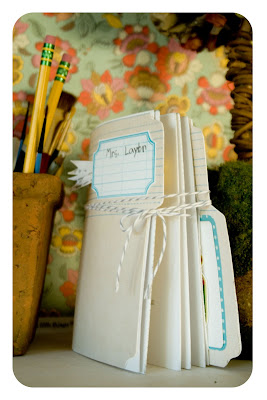
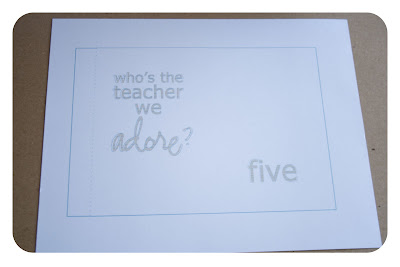
A while back Brooke Hellewell of Inchmark Journal showed a simple + fun little birthday card she made for her nephew. I loved it. This idea for a teacher appreciation card grew from that one. It's quite a long accordian fold card and I love how it turned out. Here's a little tutorial: 1. Modify the five PSD files to suit your needs and print. I simplified the word layers then used the words as masks so I could cover them with lined school paper from Splendid Fiins Too Cool For School Paper Pack 1. I defined the edges more by using the stroke/outline feature under Edit in the task bar.
2. cut using solid lines as guides.
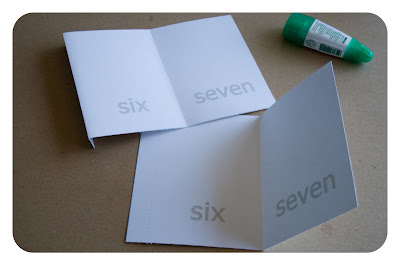
3. Fold each sheet in half to dotted line and then fold along dotted line as seen here.
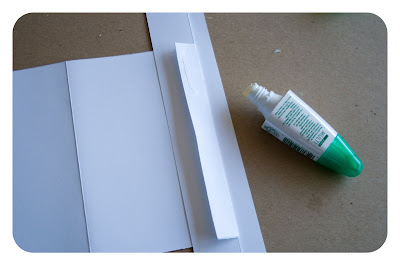
4. I used paper scraps to keep everything clean while applying glue. It worked very nicely. 5. glue as shown so that the glued tab is on the underside of the previous page. 6. This is what it will look like unfolded with two pages glued together.
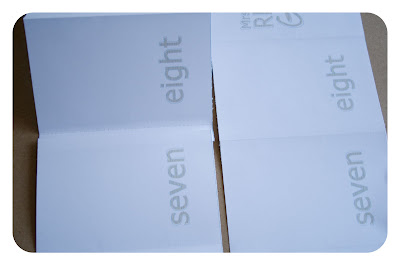
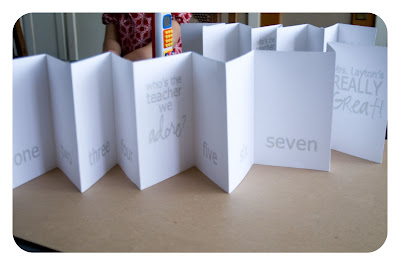
7. repeat the gluing process until all of the pages are glued together to look like this. Clear as mud? Feel Free to ask any questions! Now on to the fun part!
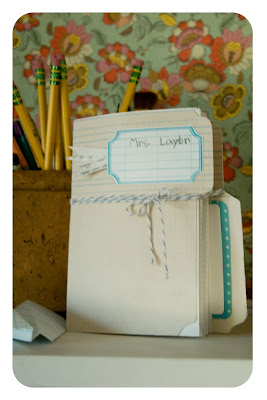
8. Decorate the front and back of your card as you see fit. I used the elements included in the Mouse Paper Scissors + Mouse Paper Scissors - Mom classes for my embellishments. I also used the file folder cut template from MPS-Mom class to make a mask. Just drop in your chosen paper [I used papers from Splendid Fiins Too Cool For School Paper Pack 1] and print or print as is and use as a cut template. I wanted mine extra sturdy so I printed a mirror image and sandwiched them together.
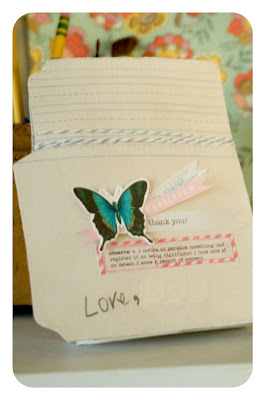
9. Repeat step 8 for back cover. I included a library card pocket to house a gift card. This was sandwiched between the two layers of the back cover. I failed to get photos of this process. I apologize. Have your child write on the card before adding the inside contents. It would be much easier that way :). To attach the guts to the cover you will want to mark where there is overlap [you can see this well in photo 8] then cover the back side of page 1/page 8 with glue avoiding the overlap areas then stick them together + use a brayer or something to really stick it down with minimal bubbles.
10. This is what it looks like all stuffed.
Here's what I included:
  1. pencil
  2. googly eyes
  3. chocolates
  4. heart stickers
  5. paperclips
  6. candy buttons
  7. sixlets [though they typically come with 8 per pkg... lucky me!]
  8. dollar coins [our teachers like to go to Cafe Rio and this just about covered lunch.]

Truthfully, this was a bit of work, but so worth it. Really. So cute! In the box you will find a zipped file that includes PSD files for the inside pages, the file folder mask + mirror image, and the library card mask. Help yourself! Please let me know if you use it. I'd love some feedback.

ps. It says:

one - two - three - four - who's the teacher we adore

five - six - seven - eight - Mrs. Layton's our teacher is really great!

Wednesday, May 18, 2011

Floating Lanterns

In my dreams our back yard is finished and we have floating lanterns nestled in the pecan tree. We have dinner parties and after dinner parties. We kick back in a hammock and enjoy twinkle lights. Of course, it's been so beautiful here lately that one can't help but dream of such things. Today I tried out tiny paper lanterns. There's a template in the box if you want one. Not that making paper lanterns is hard or anything, but I was using digi-paper [Splendid Fiins Very Krafty Mixed Bag + Too Cool For School Paper packs] the template made it easy to mix and match. The template includes three different styles [two of each]: Basic + basic with scalloped edges + top heavy with one end scalloped. If you're using digi paper you can use the full background sheet layer or you can disappear that layer and use the six small layers to mix and match. Hopefully that makes sense. Also, all of the layers are white so if you're printing the cut/fold lines onto your own patterned paper you don't need to do anything. Just print. The template is 8.5 x 11. Enjoy!

Monday, May 16, 2011

Heads Up!

Next week at JS we're having a week long challenge party. It's the 3rd annual 7 Days in May. Join us in the general forum May 23-29 for a week full of challenges. Test your scrapping skills. Bring a friend to join in on the fun. Feel free to snag this flyer and let your friends know where you will be hanging out May 23-29th. (Right click on the image and choose Save As). You won't want to miss it! And on another [really exciting] note: Announcing a special promotion where you can purchase a Silhouette SD, a package of white flocked heat transfer material, a package of teal heat transfer material, and a package of dark pink heat transfer material all for $219! That's a savings of $125, just for you, my friends! This special promotion will run from May 17-25th. I keep dreaming of a Silhouette. Get more info here.

Monday, May 2, 2011

Mondays In May

At Jessica Sprague. Every Monday in May you will have the opportunity to purchase an item from a designer and receive an item of equal or lesser value from that same designer for FREE! No coupon codes needed. Just fill your cart up with goodies and watch the magic happen! Keep in mind that you will not be able to use coupons or gift certificates during this special, so hold on to them until Tuesday. You can, however, use a coupon or gift certificate if you are just purchasing a class as classes are not included in this special. You can also use a coupon or gift certificate if you are purchasing only one item per designer. This special will end at midnight eastern time. So, for example, if you want to purchase the new "Tabbed Alpha Set" from In the Making Designs (which I know you're gonna want to), you can choose another one of the In the Making Designs products that is $3.99 or less, add it to your cart, and that price will be deducted from your total! Woo hoo! **I took this wording directly from the site because they said it much better than I would have :).